Unfortunately, as of May 2026 and RouterOS 7.23, no.
The BELKIN F5D8053 v6 is basically a Realtek RTL8191SU/RTL8192SU, which currently does not seem to be supported to act as a Wifi interface for RouterOS on ARM32.
Unfortunately, as of May 2026 and RouterOS 7.23, no.
The BELKIN F5D8053 v6 is basically a Realtek RTL8191SU/RTL8192SU, which currently does not seem to be supported to act as a Wifi interface for RouterOS on ARM32.
Short: Yes, it does. But likely only with specific network chips.
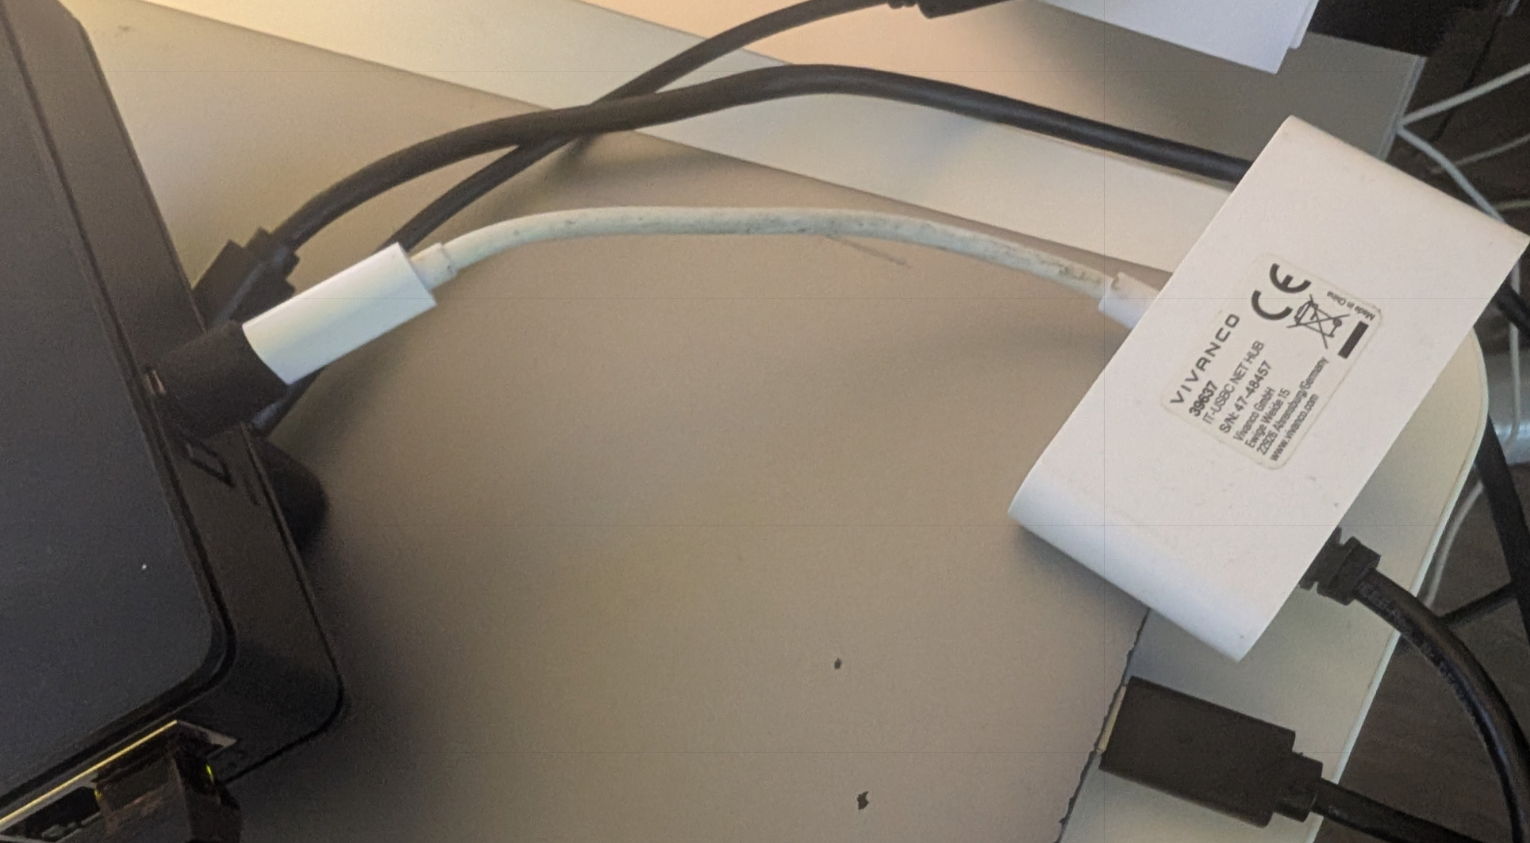
In my case, I tested with a small USB-C docking adapter, which I connected to my hAP ax S via USB-A to USB-C adapter as shown in the picture below. The chip is a Realtek RTL8153, which was immediately recognized by RouterOS and added as “ether6” interface to my interface list. (The hAP ax S without USB attachments features 5 ethernet ports called ether1-5 and 1 SFP port called “sfp1”.)
MikroTik as of right now does not feature a compatibility list of attachable network chipsets. They have a page called “Peripherals” which poses as a compatibility list for LTE modems, SFP modules and U.2 disks. I will inquire with MikroTik support if they see sense in adding a section for ethernet adapters.
Short: Yes, works. I tested a Dell D3100 docking station with a built-in active USB hub in conjuction with the USB port of the hAP ax S. The following things worked find out of the box:
All cases worked flawlessly in both 7.20.x and the latest stable 7.22.x of MikroTik RouterOS.
Important to note is, that the docking station of course is actively powered. Given the small max power output of the USB port, this is the only way to run multiple LTE dongles AND storage devices in parallel.
Something that did not work yet is the docking stations internal Ethernet chip, even though it advertises itself as CDC_NCM but specifies no further chip it is based on. Given the non-existing amount of documentation about running additional ethernet ports via USB on MikroTik-devices, I assume the chances to be very small that this would work, anyway.

Every now and then some old VHS pops up after cleaning old storages, shelfes, workshops. And I am by far not a professional VHS digitizing service, but some VHS’s are really worth preserving to me, so I have a cheap VHS player and a Hauppauge USB-Live2 analogue USB capture device.
A very simple way to capture the video and store it, would be:
ffmpeg -f v4l2 -framerate 25 -i /dev/video0 -t 03:10:00 -f alsa -i plughw:2,0 -c:v libx264 -vf format=yuv420p -preset ultrafast -crf 23 -c:a aac -b:a 192k output2.mp4
One could ofc adjust some parameters. In my case this was running on old hardware, where everything more CPU-bound than libx264 with the “ultrafast” preset would congest the CPU too much, leading to frame drops.
The point here was also never to store in archive quality, for that I would need another VHS playback device with a TBC (Time Base Corrector) to decrease the horizontal jitter in the VHS, anyway. They are expensive. Or I would have to enter the whole new world of vhs-decode. Maybe one day.
Sometimes I work with very old IT server infrastructure, but this should not be the topic of today. We focus on the client side today, where it happens from time to time that companies and people from various fields, such as old client software based on Java 5, 6, 7, or 8, are bound to this kind of legacy for other reasons.
As an operator of services such as SFTP, this really is not ideal. You either have to exclude such clients to maintain an up-to-date server infrastructure, or include them and provide some form of backwards compatibility.
To test that compatibility, you would need to either have all clients available that your peers use or at least be able to simulate them. I happened to have issues with clients that require, by nowadays’ standards, very short Diffie-Hellman parameters to be supplied by the server. Java 5, 6, 7, 8 are limited to 1024 bit of length.
(more…)Likely this is because your filenames are too long, over 255 bytes. However, if you have enabled encryption on your shares in Synology, that limit is lowered to 143 bytes, which is much easier to hit.
eCryptfs, which Synology uses for encrypted shares, must keep encrypted filenames within the underlying filesystem’s 255-byte limit, but encryption adds padding and metadata and then expands further due to Radix-64 Uuencoding. Because these transformations increase size significantly, the original plaintext-filename is limited to about 143 bytes to ensure the final encoded name never exceeds 255 bytes. The recommendation of the developers of eCryptfs actually suggests a limit of 140 bytes.
I specifically noticed this problem when moving around data from an encrypted TrueNAS setup to an encrypted Synology share via rsync+ssh. Because TrueNAS uses ZFS’ encryption feature, it does not have this constraint.
When copying with rsync -v, the output is very verbose and it is easy to miss copy errors due to long filenames. Taking this further, there is a high chance for data loss when no special attention is applied. If you need to rsync -v, make sure to also do a second run without -v to really only see the errors listed.
Create a new share without encryption and copy over all files with the tool of your choice. Then merge your data towards the Synology NAS’ unencrypted share.
Shorten your filenames.
Neueste Beiträge
Englische Beiträge
Eigene Links
Kategorien
Archiv
Links