Last year, I acquired an Epson Perfection V850 Pro, also known as the GT-X980. The package included both transparency and reflective targets for calibration from X-Rite. In my specific case, these targets were not accepted by either the auto-calibration or the manual calibration in SilverFast.
The auto-calibration failed because the targets are not original targets from LaserSoft Imaging AG. The manual calibration in SilverFast failed because the delta value was allegedly far too high, which I personally attribute to a software error. This is because the manual calibration and creation of a colour profile with X-Rite, as shown below, did not reveal such a problem.
Scanning the target with EPSON Scan
To begin, an accurate scan without colour correction and without any adjustments to the image is required. The following screenshots show my configuration. Important factors include the resolution, colour depth, and the disabled colour correction settings in the “Configuration …” dialogue.
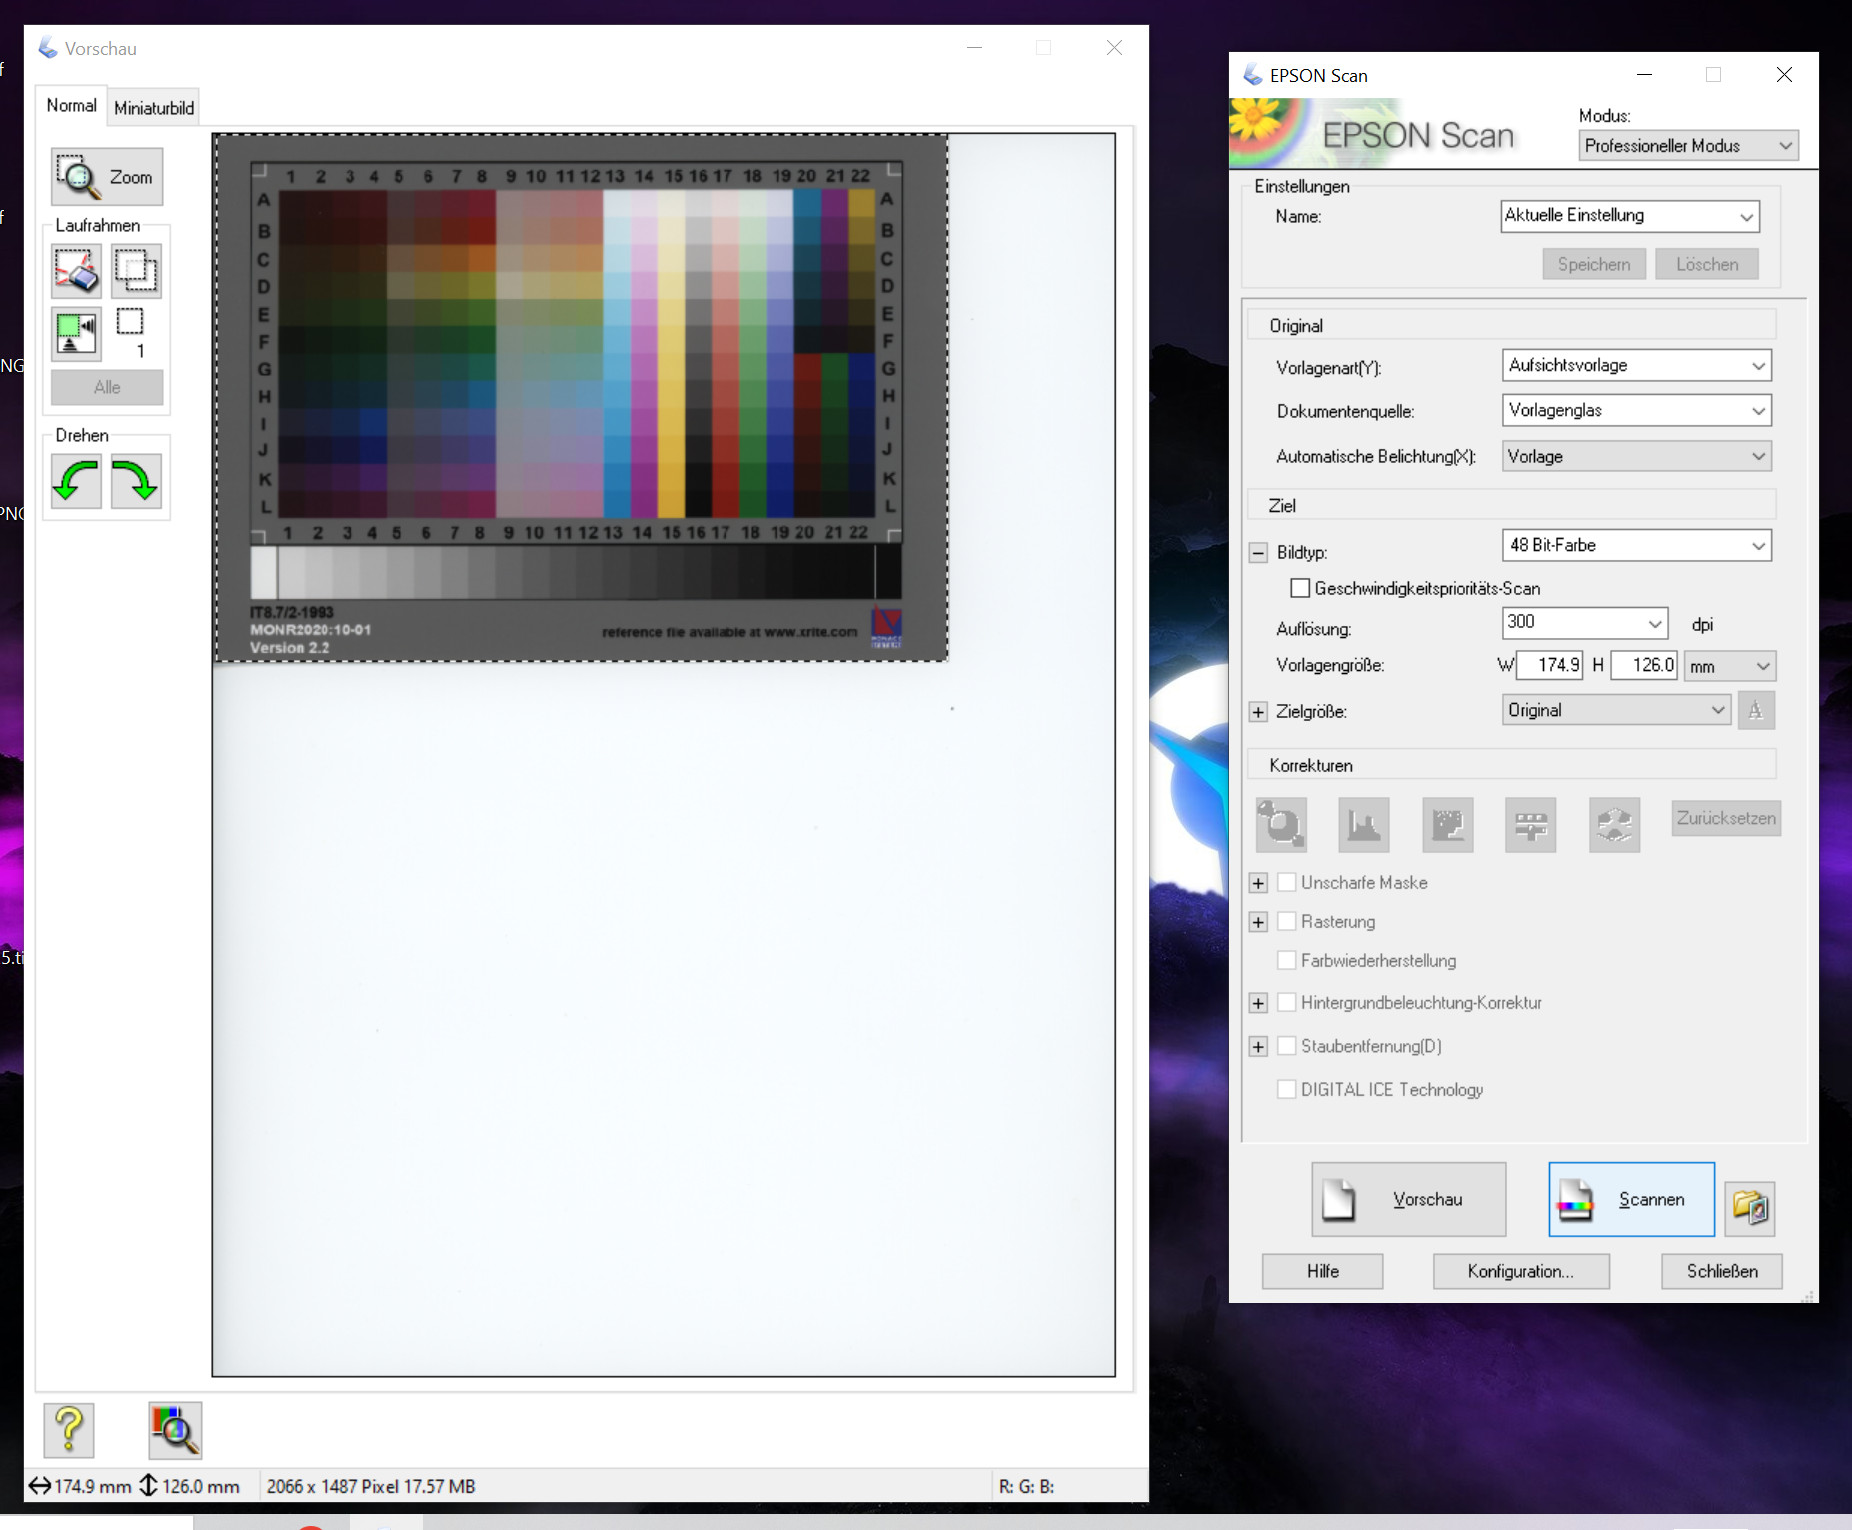
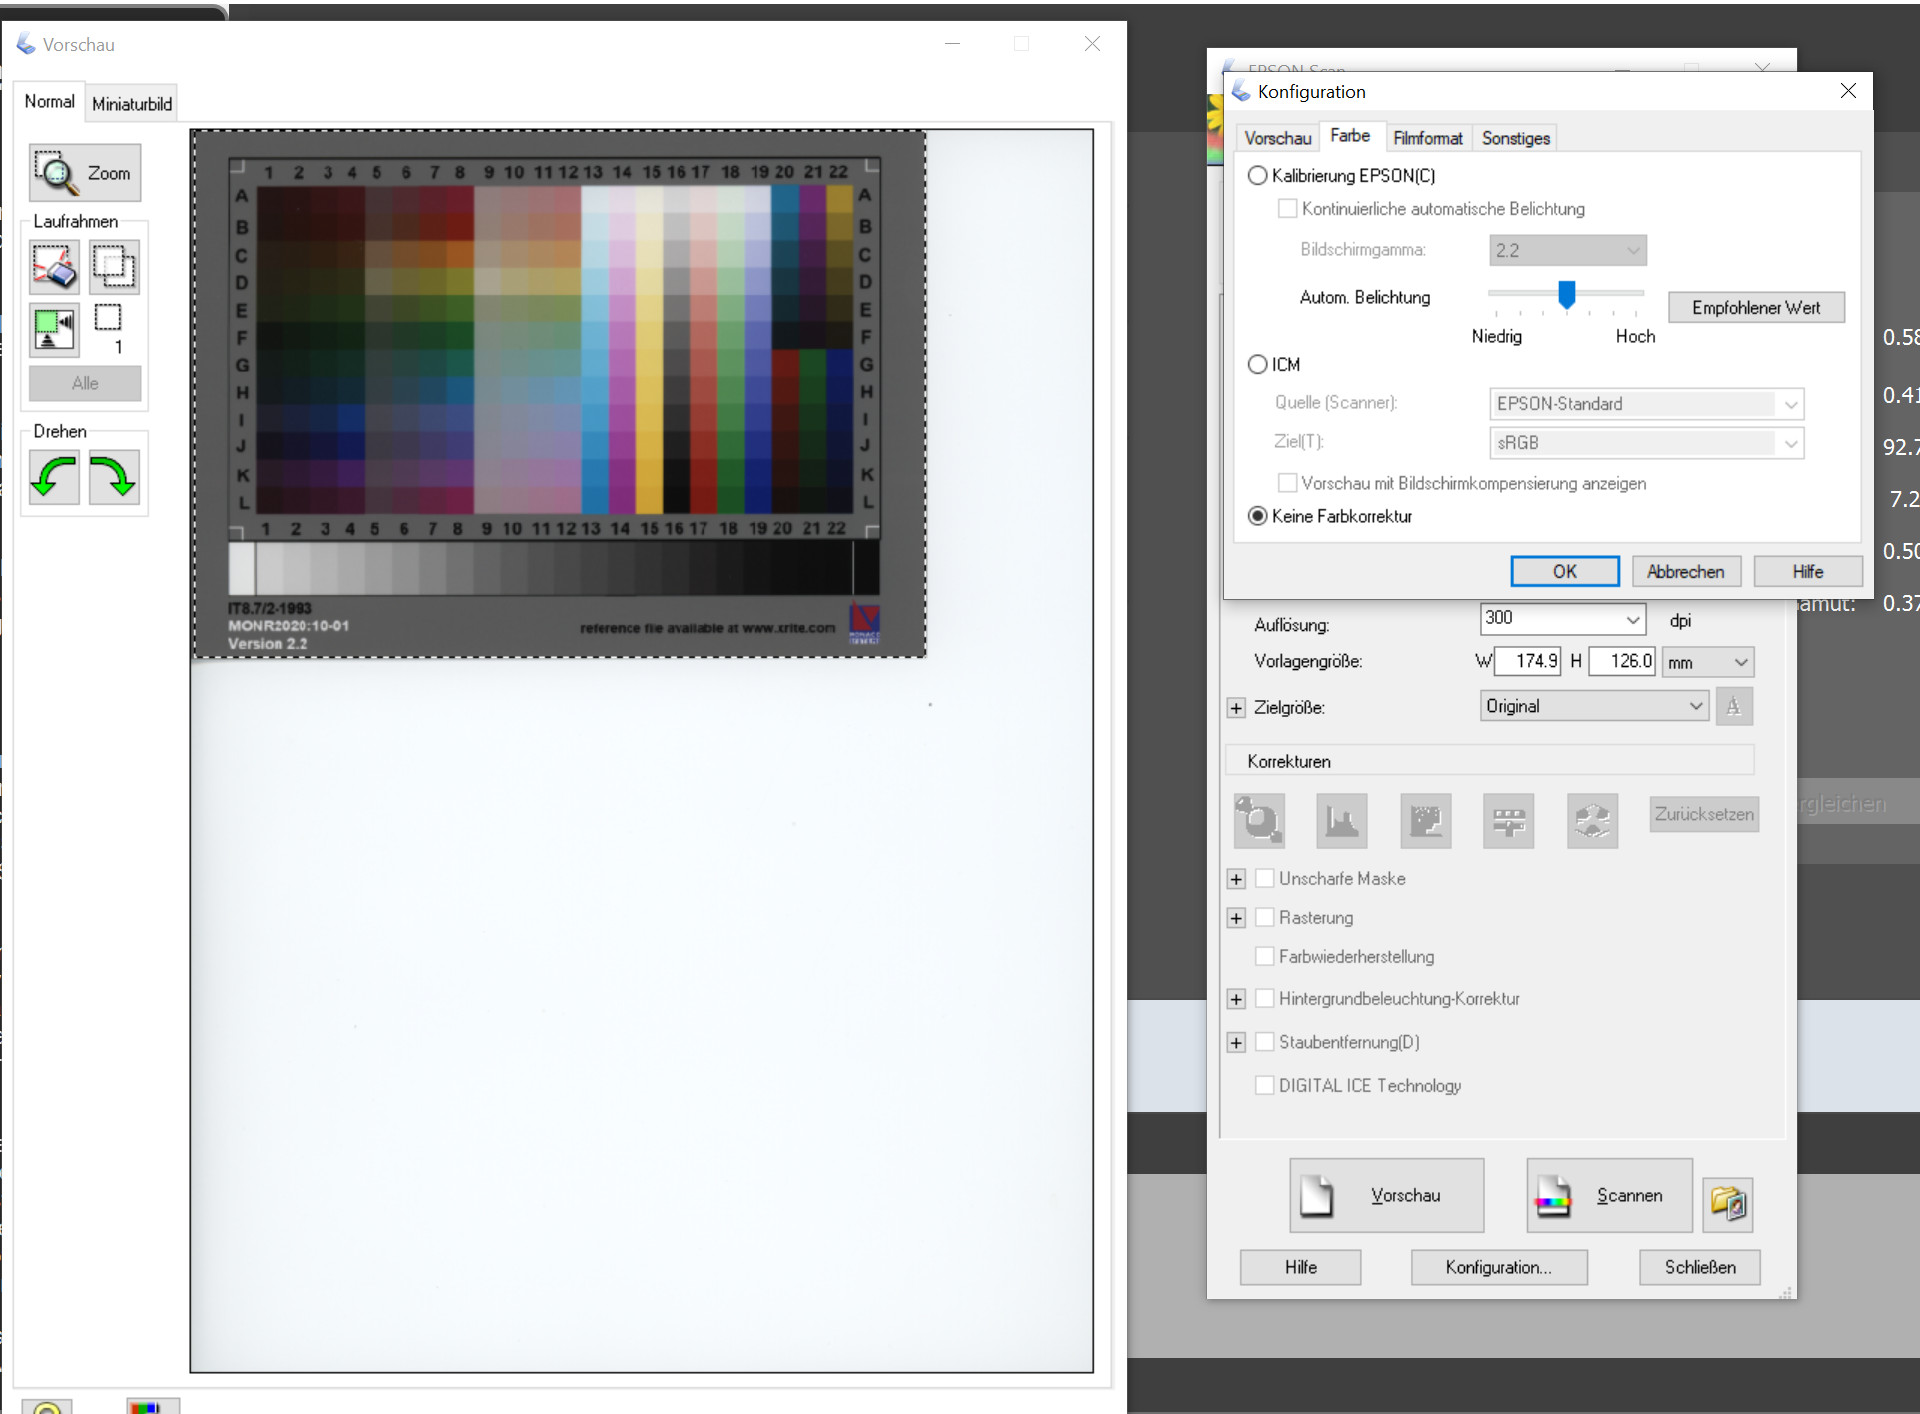
It is essential to follow the settings exactly, as an incorrect scan would lead to a faulty colour profile and thus to inaccurate scans. Although an existing scan can be subsequently provided with a new colour profile, it will still not be accurate due to physical conditions (e.g., temperature fluctuations). Therefore, the manufacturers of the targets and scanners also recommend repeating the calibration regularly, especially in the case of significant temperature fluctuations.
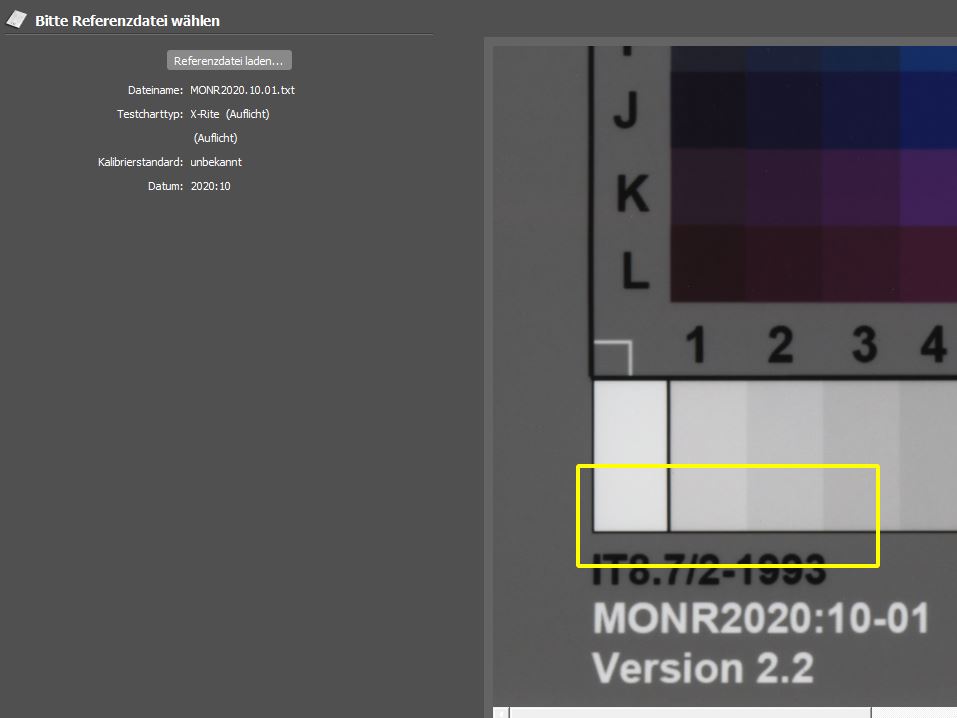
Locate the reference file and download it
To create the colour profile using X-Rite i1Profiler in the next step, we need a reference file for our IT8 target. We can usually find this file on the website of the target’s manufacturer. In my specific case, the required file is included in this ZIP file from X-Rite.
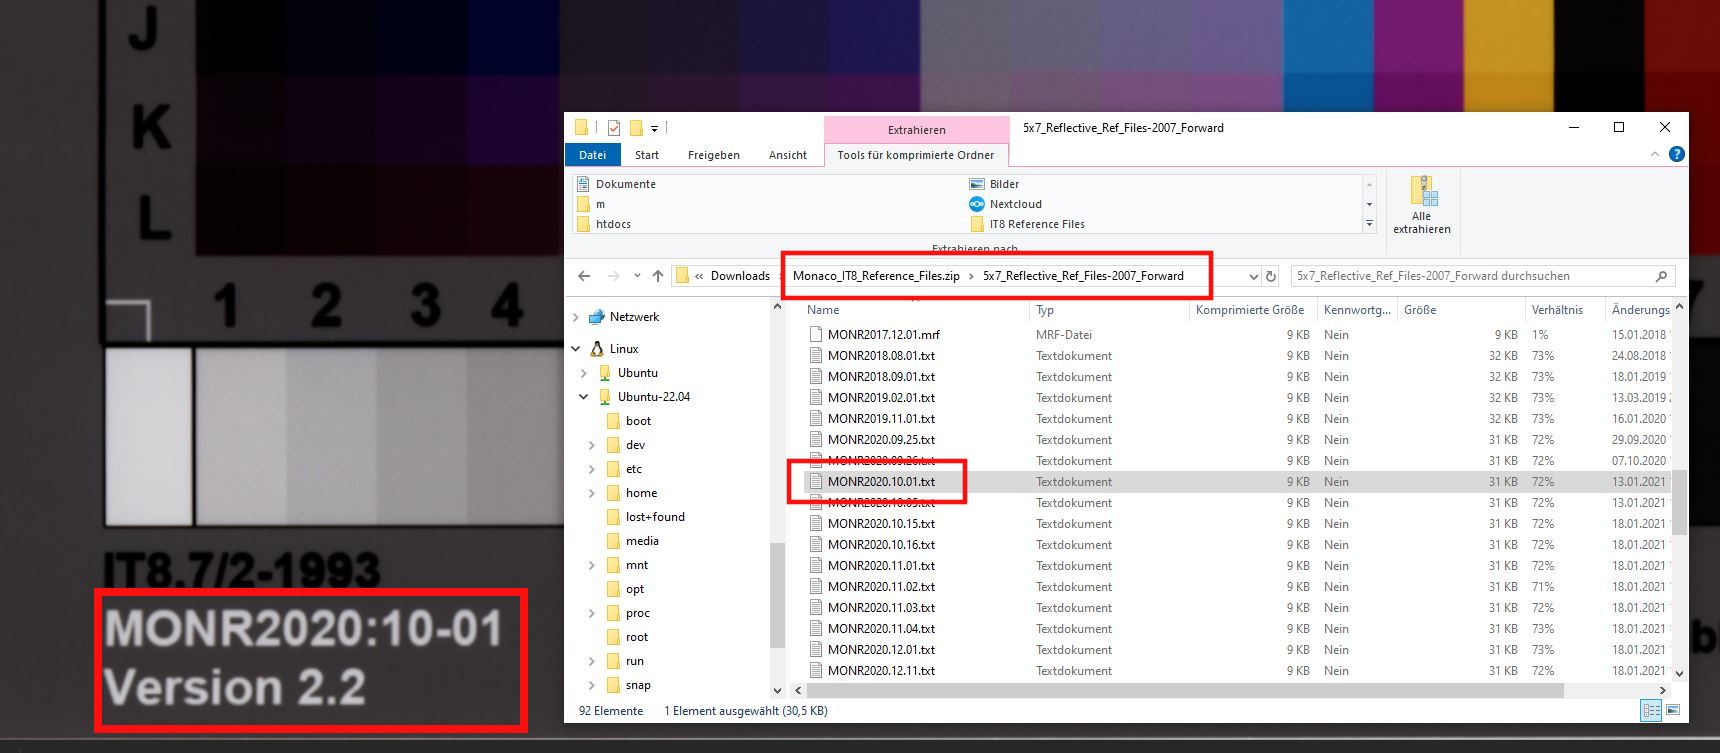
Accuracy is crucial here as well: the exact matching reference file must be selected. The designator can be found on the IT8 target. It is also essential to distinguish strictly between “Reflective” and “Transparency”!
Creating the colour profile with X-Rite i1Profiler
We now have:
- a reference scan
- a reference data file
According to the following screenshots, we will now proceed through the colour calibration process in i1Profiler. We will correctly set the cut marks, select the correct reference file, and save our profile.

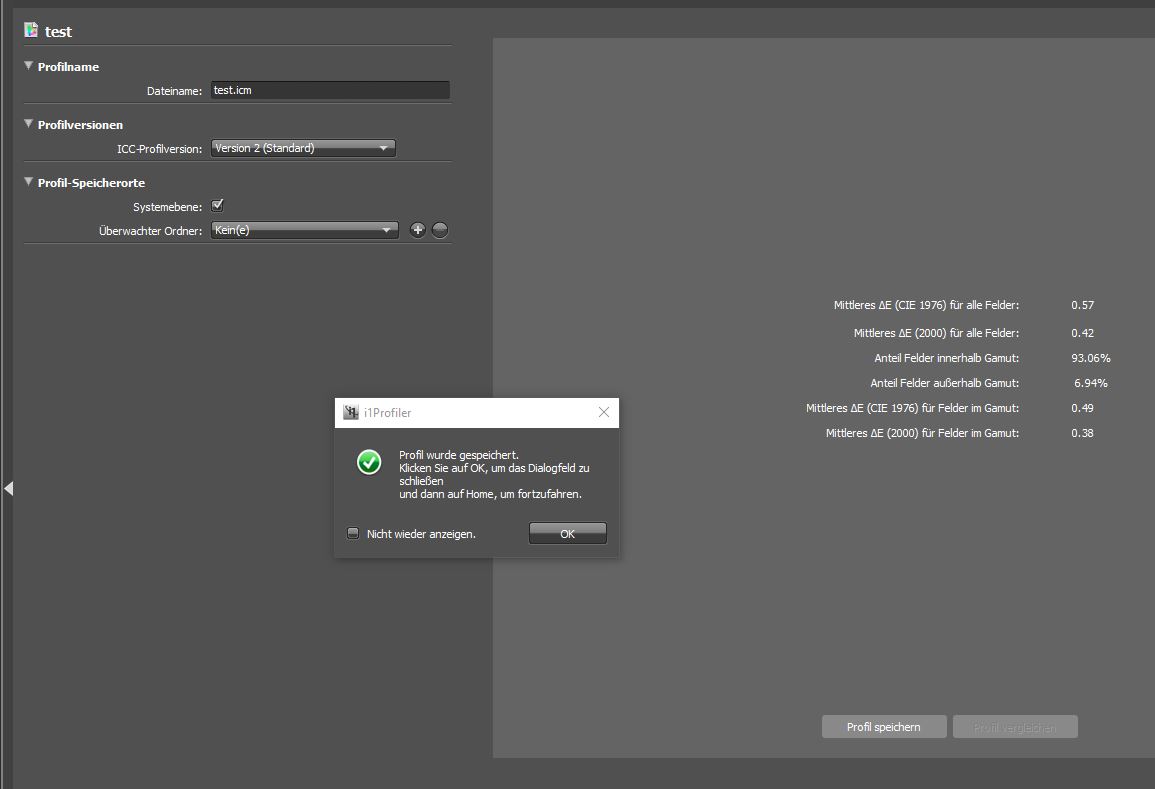
i1Profiler must confirm the successful creation of the profile. If it does not do this, or if it gives us error messages or warnings, we need to recheck each step of the process.
On the right side, i1Profiler provides some useful values. Primarily, the delta value is relevant, as it indicates the deviation of our scan in relation to the reference files.
If the deviation is out of range, X-Rite will issue a warning, indicating an error in the reference scan or an incorrect reference file. In specific cases, the value might also point to a severely outdated or poor-quality target.
Wrap up
We have now relatively easily created a valid colour profile for our scanner. I am writing this guide because there is very little good information available on the internet, and even fewer precise examples (e.g. screenshots from “EPSON Scan”) that can be directly implemented in one’s own setup.
This guide includes about 2-3 hours of trial and error, as parameters often did not match. This was partly due to my limited understanding of the matter, but also because of the exceedingly poor documentation provided by both SilverFast and X-Rite.
If my guide was helpful or if something did not work, I would appreciate feedback in the form of an email or a comment!
Leave a Reply