This article was previously posted on gettingcirrius.com, a blog of Richard Clayton, who released it under Attribution 3.0 Unported (CC-BY 3.0). His old blog recently went offline, therefore I am reposting this useful how-to on setting up SSL for the RabbitMQ management console.
This is an article in the RabbitMQ Configuration and Management Series. For more articles like this, please visit the series’ index.
The process for securing the RabbitMQ Management Console with SSL is very similar to securing the AMQP port. Instead of rehashing how to do certificates, we will assume that you had followed the tutorial on Configuring SSL for RabbitMQ and are now securing the console.In Configuring SSL for RabbitMQ, we took the convention of using the /etc/rabbitmq/ssl directory for storing certificates. If you followed the directions in that post, you should already have the certificates you need for securing the console. Alternatively, if you choose to use a separate certificate for the Management Console than the AMQP port, simply create a new certificate and key using the make_server_cert.sh script.
CONFIGURE RABBITMQ TO USE SSL FOR THE RABBITMQ MANAGEMENT CONSOLE.
Edit the rabbitmq.config file in the /etc/rabbitmq directory:
sudo vi /etc/rabbitmq/rabbitmq.config
Add a configuration entry:
  [{listener,
    [{port, 15672},
     {ssl, true},
     {ssl_opts,
       [{cacertfile, "/etc/rabbitmq/ssl/ca/cacert.pem"},
        {certfile,   "/etc/rabbitmq/ssl/server/{hostname}.cert.pem"},
        {keyfile,    "/etc/rabbitmq/ssl/server/{hostname}.key.pem"}]}
     ]}
]}
].
And of course, using our example:
  [{listener,
    [{port, 15672},
     {ssl, true},
     {ssl_opts,
       [{cacertfile, "/etc/rabbitmq/ssl/ca/cacert.pem"},
        {certfile, "/etc/rabbitmq/ssl/server/rabbit3.cert.pem"},
        {keyfile, "/etc/rabbitmq/ssl/server/rabbit3.key.pem"}]}
     ]}
]}
].
More importantly, the config with AMQP/SSL, iptables port range for clustering, and the Management console using SSL:
{rabbit, [ {tcp_listeners, [5672] },
           {ssl_listeners, [5673] },
           {ssl_options, [
             {cacertfile, "/etc/rabbitmq/ssl/ca/cacert.pem" },
             {certfile, "/etc/rabbitmq/ssl/server/rabbit3.cert.pem" },
             {keyfile, "/etc/rabbitmq/ssl/server/rabbit3.key.pem" },
             {verify, verify_peer},
             {fail_if_no_peer_cert, true }]}
]},
{rabbitmq_management,
  [{listener,
    [{port, 15672},
     {ssl, true},
     {ssl_opts,
       [{cacertfile, "/etc/rabbitmq/ssl/ca/cacert.pem"},
        {certfile, "/etc/rabbitmq/ssl/server/rabbit3.cert.pem"},
        {keyfile, "/etc/rabbitmq/ssl/server/rabbit3.key.pem"}]}
     ]}
 ]},
{kernel, [ {inet_dist_listen_min, 9100},
            {inet_dist_listen_max, 9105} ]}
].
Restart RabbitMQ.
sudo service rabbitmq-server start
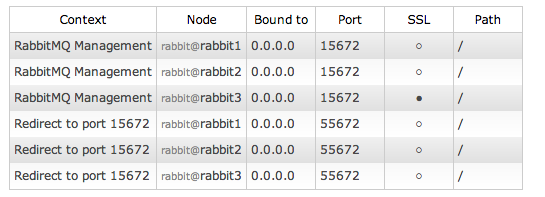
VERIFY SSL ON MANAGEMENT CONSOLE
Open your browser to the RabbitMQ Management Console, but don’t forget to use “https”.
FORCING THE BROWSER TO AUTHENTICATE USING CERTIFICATES.
Edit the rabbitmq.config file in the /etc/rabbitmq directory.Add {verify, verify_peer}, {fail_if_no_peer_cert, true } to the ssl_options of rabbitmq_management.
  [{listener,
    [{port, 15672},
     {ssl, true},
     {ssl_opts,
       [{cacertfile, "/etc/rabbitmq/ssl/ca/cacert.pem"},
        {certfile, "/etc/rabbitmq/ssl/server/{hostname}.cert.pem"},
        {keyfile, "/etc/rabbitmq/ssl/server/{hostname}.key.pem"},
        {verify, verify_peer},
        {fail_if_no_peer_cert, true }]}
     ]}
]}
].
Which now looks like:
{rabbit, [ {tcp_listeners, [5672] },
           {ssl_listeners, [5673] },
           {ssl_options, [
             {cacertfile, "/etc/rabbitmq/ssl/ca/cacert.pem" },
             {certfile, "/etc/rabbitmq/ssl/server/rabbit3.cert.pem" },
             {keyfile, "/etc/rabbitmq/ssl/server/rabbit3.key.pem" },
             {verify, verify_peer},
             {fail_if_no_peer_cert, true }]}
]},
{rabbitmq_management,
  [{listener,
    [{port, 15672},
     {ssl, true},
     {ssl_opts,
       [{cacertfile, "/etc/rabbitmq/ssl/ca/cacert.pem"},
        {certfile, "/etc/rabbitmq/ssl/server/rabbit3.cert.pem"},
        {keyfile, "/etc/rabbitmq/ssl/server/rabbit3.key.pem"},
        {verify, verify_peer},
        {fail_if_no_peer_cert, true }]}
     ]}
 ]},
{kernel, [ {inet_dist_listen_min, 9100},
            {inet_dist_listen_max, 9105} ]}
].
Restart RabbitMQ.
sudo service rabbitmq-server restart
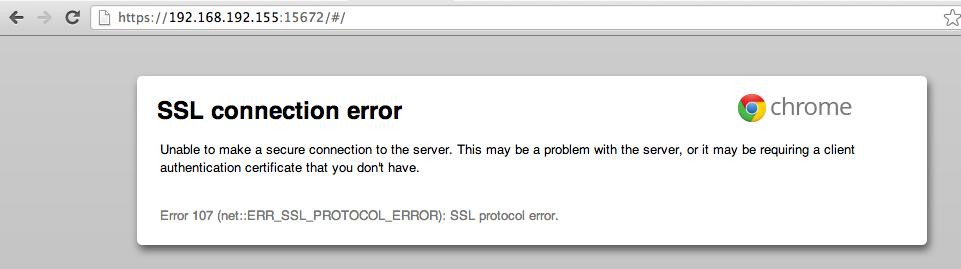
VERIFY CERTIFICATE AUTHENTICATION
Visit the RabbitMQ Management Console without a certificate from the broker’s CA installed in your browser.
GENERATE AND INSTALL CLIENT CERTIFICATE FOR BROWSER-BASED AUTHENTICATION.
Each browser and sometimes browser-OS pairing has a different way of installing certificates.
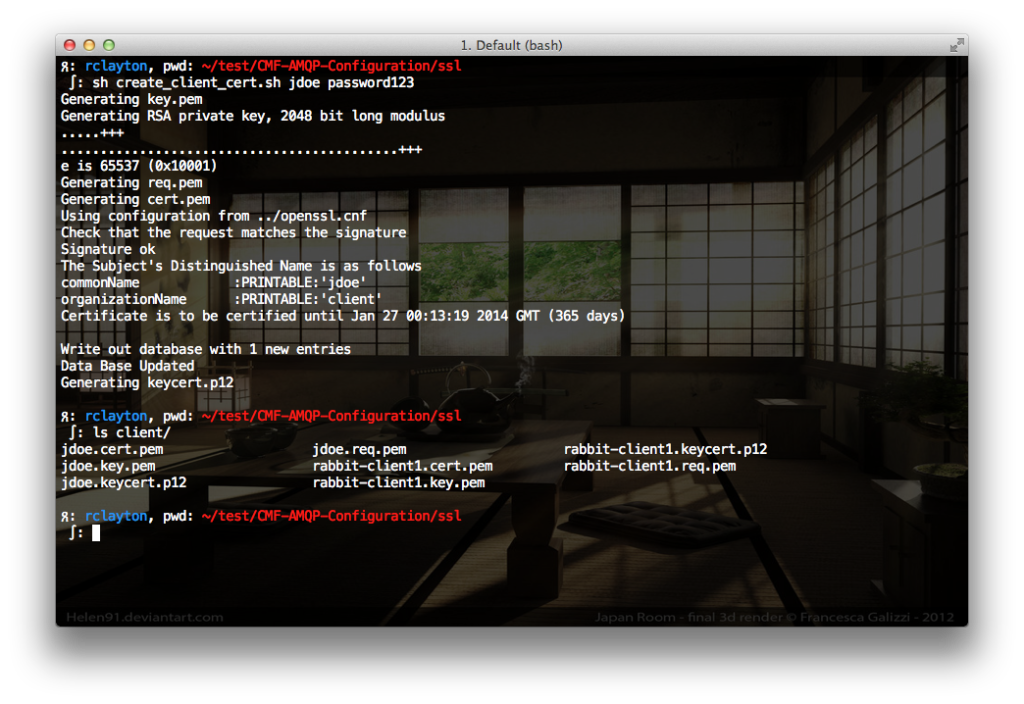
Generate a Client Certificate.
Using the create_client_cert.sh script, generate a certificate for your user.sh create_client_cert.sh {username} {password}
For example:sh create_client_cert.sh jdoe password123
In the ssl/client directory, you will see a couple of new files:
jdoe.key.pem: John Doe’s private keyjdoe.cert.pem: John Doe’s public keyjdoe.req.pem: John Doe’s certificate signing request (CSR)jdoe.keycert.p12: John Doe’s Public-Private Key pair that can be used by the operating system or browser.
Install the Certificate for Chrome and Safari.
Browsers like Chrome and Safari that use the underlying OS’s keystore. So the instructions will depend on the OS. This is how to do it in OSX.a.
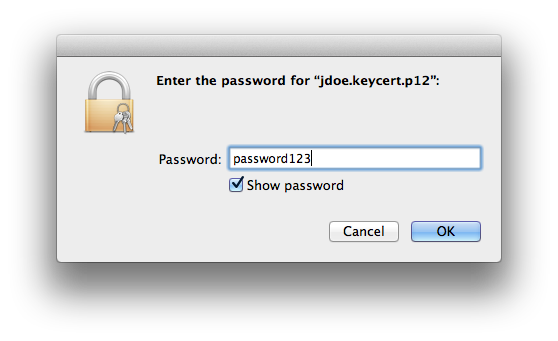
Double-click the jdoe.keycert.p12, and OSX at the very least, will install the certificate into its Keychain:
You will be prompted for the password you entered in the create_client_cert.sh command.
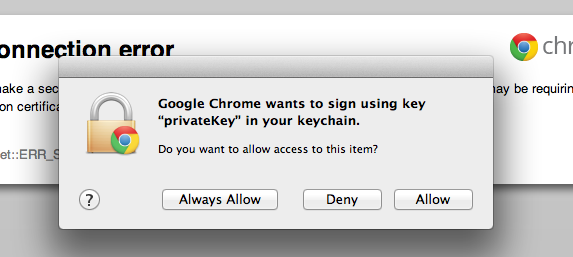
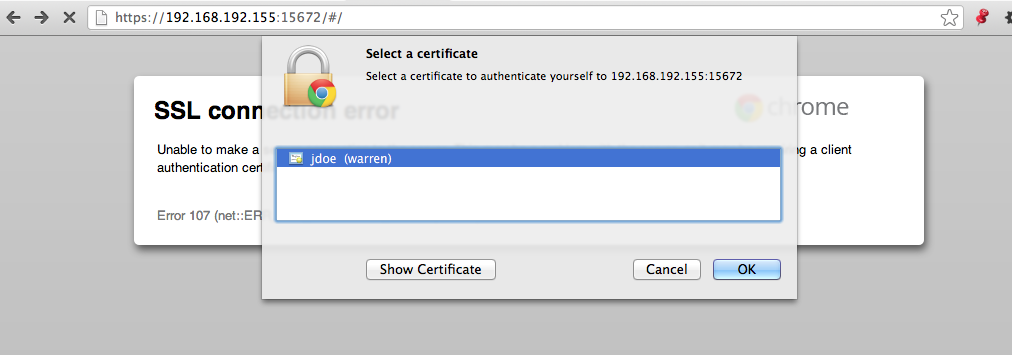
Visit the RabbitMQ Management Console again.
You will be prompted to select a certificate. In this case, there will only be one to select:
Chrome will prompt you for permission to sign the request with your private key:
Install the Certificate for Firefox.
Navigate in the menu to Preferences -> Advanced -> Encryption.
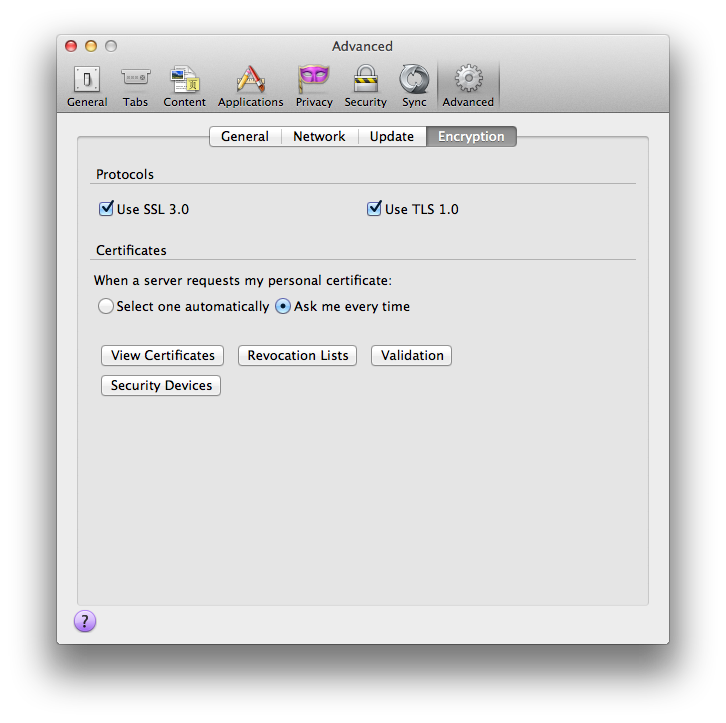
Press the “View certificates” button.
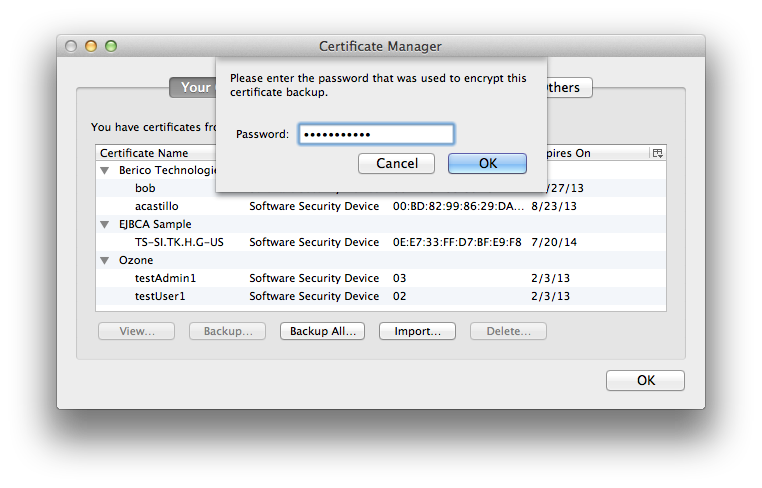
Press the “Import…” button, and select the certificate to install (in our case joe.keycert.p12). Enter the password used for the creation of the certificate when you executed the create_client_cert.sh command (“password123” for the example).
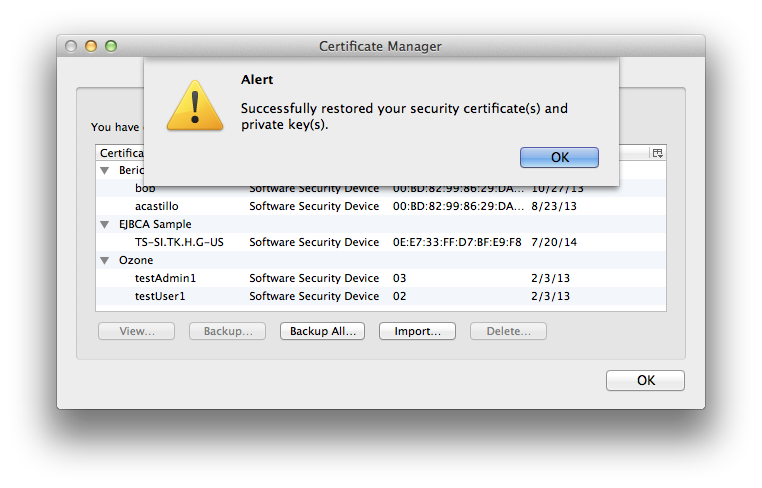
If the password is correct, Firefox will congratulate you.
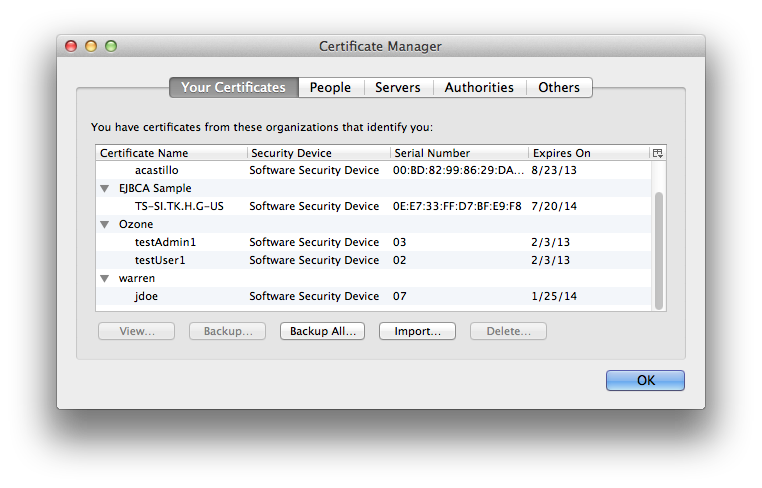
You will now see the certificate in the “Your Certificates” tab of the “Certificate Manager” window. Our example certificate for “jdoe” is at the bottom:
Visit the RabbitMQ Management Console again.
You will be prompted for a Certificate, Firefox will automatically select the best certificate based on the Certificate Authority.
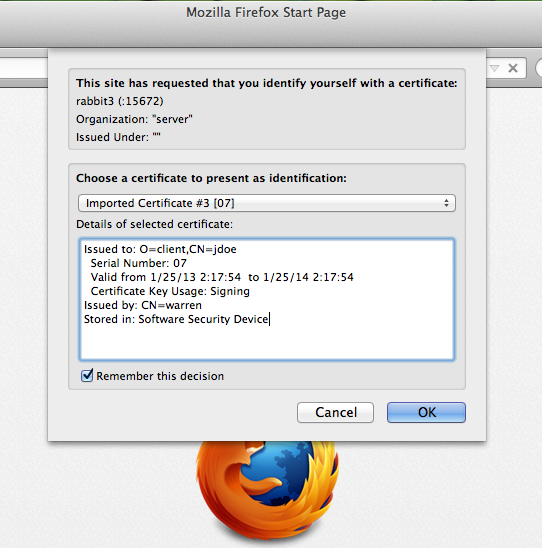
After you’ve pressed “OK”, you should be in!
Leave a Reply